How our Panama Hats are made
History of the Panama Hat
The Panama Hat traces its roots back to 17th century Ecuador. However, it did not acquire its modern name until the 19th century. During this period the hats were brought to Panama by Ecuadorian merchants before being shipped around the world. The name “Panama” became firmly attached to the hat during the construction of the Panama Canal, when they became a favourite of the construction workers labouring in the hot humid conditions.
We are proud to still make all our hats individually by hand in Ecuador. Each hat is skilfully hand woven from the narrow fibres of “toquilla” straw and then carefully steamed, ironed and "blocked" to shape.
How our Borges & Scott Panama Hats are made
It's a long process to make a hat - it can take up to 6 months to make one of the very best. On this page we'll be explaining the process and including some pictures and videos of our hats in the making. We'll be adding to this guide from time to time, so please keep checking back for more information...
Stage 1 - the raw materials
Every Borges & Scott hat starts life as “Paja Toquilla” – straw from the Toquilla palm (Carludovica Palmate) grown in the damp coastal areas of Ecuador. Central leaf stalks, which have not yet opened into leaves, are carefully selected and harvested. Once collected, the stalks are “pealed” back to reveal thin fibres which are individually separated by hand. Once these thin fibres have been separated the stalk is “blanched” in hot water to soften the fibres before being hung to slowly dry in the shade.
| The Paja Toquilla plant. | 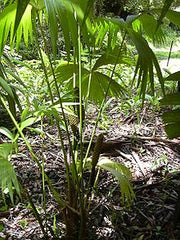 |
Straw drying before being used in a Borges & Scott hat. | 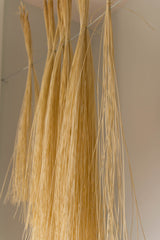 |
Stage 2 - the start of the weave
The straw is then passed to its weaver to carry out the main stage of weaving the basic shape of the hat. Eight stands of similar width are carefully selected and woven in a special pattern to produce the “spider” – the very centre of the crown of the hat. More fibres are then carefully added to the spider as more rings are added to the hat – an individual hat may contain several hundred fibres.
Stage 3 - the weave
Once the first couple of inches of the hat have been formed, the hat is placed on a wooden block and woven around that block to produce the basic shape of a hat. This is a painstakingly slow process that can (for the very finest hats) take up to three months of diligent weaving. Whilst working the weaver adopt the traditional stance of resting their chest on a cushion placed on top of the hat and weaves the fine fibres from above, making sure each ring of fibres is of a consistent tightness and width.
| The traditional weaving stance. | 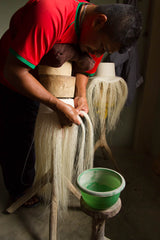 |
The skill. | 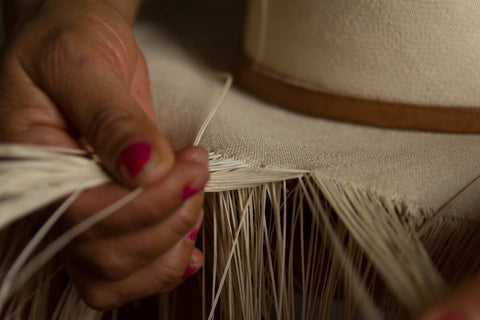 |
Stage 4 - the back-weave
After the main weave of the hat is complete, the next stage is to “back weave” the ends of the fibres. This specialist process (often carried out by a specialist back-weaver, rather than the weaver) ensures that each fibre is securely held in place, and by doing so produces the double layer of straw that makes up the rim of our Panama hats. The back-weave is then slowly tightened to produce the smooth edge found at the outer edge. Any excess straw is trimmed to leave the basic hat shape that is ready to be softened and shaped.
| Back-weaving in progress. | 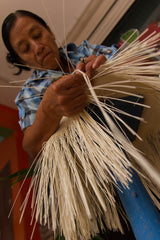 |
The back-weave in progress. You will see this pattern around the rim of all Borges & Scott hats (except our range for children). Inferior hats edge the rim with material or use machine stitching to hold the fibres in place. |  |
Stage 5 - Softening
First all the excess straw around the brim of each hat is carefully trimmed off. Then the first stage of softening sees the hat being washed, soaked and dried (the finest hats require this process to be repeated several times). Each hat is then pummelled with wooden mallets to soften the fibres and develop its flexibility. Traditionally a time and labour consuming process that was done by hand, increasingly hammering machines are being used to produce quicker and more consistent results. It is at this stage that the hat may also be bleached with sulphur to lighten the colour of the straw to the more traditional cream colour seen in many Borges & Scott hats.
| Trimming the brim... | 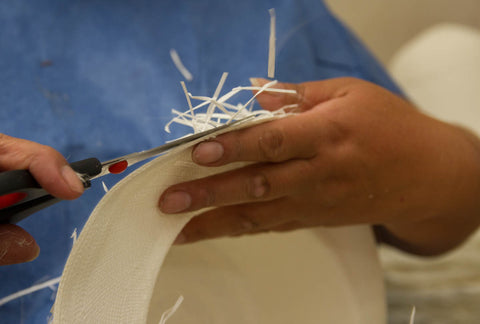 |
A hat being hammered in a "modern" softening machine. | 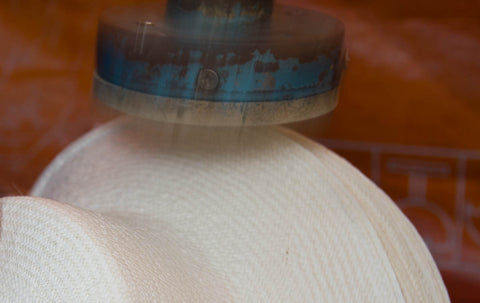 |
Stage 6 - Ironing
The hat is then passed on to a specialist ironer, who carries out a final trim of any fibres that still poke out of the hat to produce a perfectly smooth feel. The hat is then secured to a wooden block with a thin leather belt and ironed to smooth the hat and to give it the start of its shape. Not trusting modern technology to give perfect results, traditional charcoal heated irons are still the preferred tools of many ironers.
| Preparing to iron the hat... | 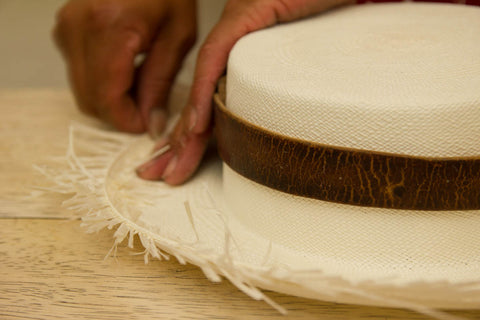 |
A hat being ironed with a charcoal iron. | 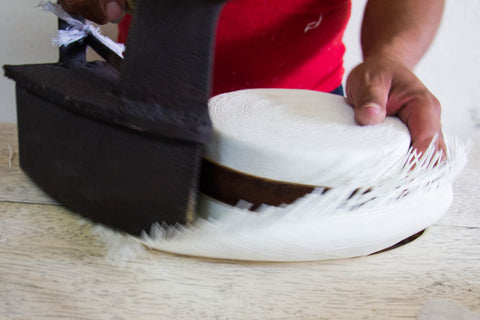 |
Stage 7 - Blocking
Once ironed, the hat is ready to be shaped into a particular style of hat (such as a Fedora, Planter or Folder). This process can be done is two ways. By hand steaming the hat and pressing it onto a shaping “block” with weights on top or alternatively, a steam press is used to steam a hat at the same time as pressing it over a shaping block. Borges & Scott use both techniques. Once shaped, the hat is left to dry, an internal sweatband is carefully sewn into place and an external finishing ribbon applied.
| The first stage of blocking, the basic shape of the hat is being pressed onto a preformed shape to then be steamed. | 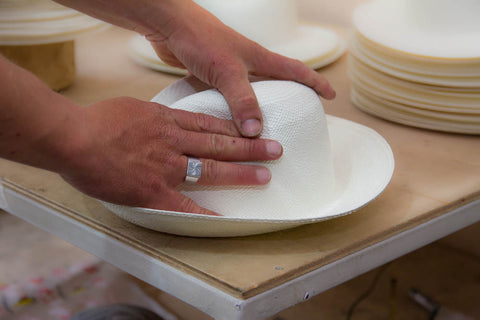 |
The internal sweat band being skillfully sewn into place. | 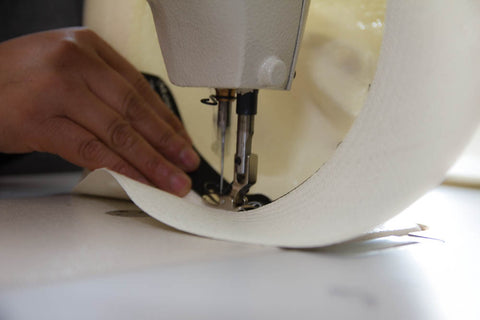 |